最近使用微信小程序云开发过程中,遇到了个导出数据表数据为excel的需求,查阅了下网上资料,教程很详细但是我跑不起来(因为原作用了两个云函数,我只需要用一个云函数),自己重新写了下,原教程为CSDN编程小石头编写 小程序导出数据到excel表,借助云开发后台实现excel数据的保存
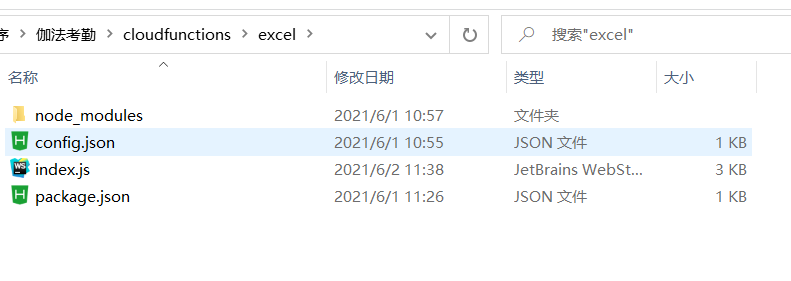
1、新建云函数名称customize_excel,去往云函数目录下执行npm install node-xlsx安装cnpm也可,安装完成后会出现如下node_modules文件夹
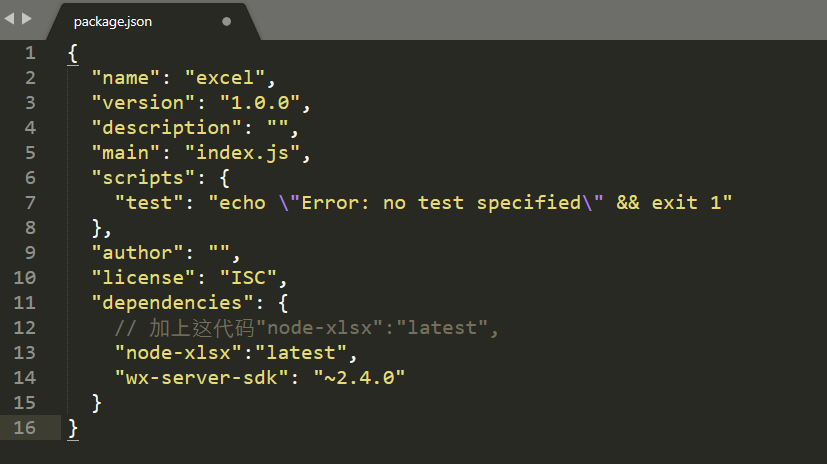
2、打开customize_excel目录里的package.json,在dependencies下加入"node-xlsx":"latest",
3、开始编写云函数,代码如下
// 云函数入口文件
const cloud = require('wx-server-sdk')

cloud.init({ env: '此处为你的云环境' })
// 连接上云环境
const db = cloud.database({ env: '此处为你的云环境' })
// 定义数据表
const signInColletion = db.collection("signIn")
const _ = db.command

//操作excel用的类库
const xlsx = require('node-xlsx');

// 云函数入口函数
exports.main = async (event, context) => {
  return signInColletion.where({
      // 按照指定的范围查询数据
      date:_.and(_.gte(event.start_date),_.lte(event.end_date))
    }).get().then(res => {
        // 获取查询的数据
      let userdata = res.data;
      //1,定义excel表格名
      let dataCVS = '自定义考勤数据.xlsx'
      //2,定义存储数据的
      let alldata = [];
      // 导出数据表属性
      let row = ['账号', '日期', '姓名', '部门', '早签', '午退', '午签', '晚退'];
      alldata.push(row);
          // 循环输出
      for (let key in userdata) {
        let arr = [];
        arr.push(userdata[key].account);
        arr.push(userdata[key].date);
        arr.push(userdata[key].username);
        arr.push(userdata[key].department);
        arr.push(userdata[key].morning_signIn);
        arr.push(userdata[key].morning_signInOut);
        arr.push(userdata[key].pm_signIn);
        arr.push(userdata[key].offDuty_signOut);
        alldata.push(arr)
      }
      //3,把数据保存到excel里
      var buffer = xlsx.build([{
        name: "mySheetName",
        data: alldata
      }]);
      //4,把excel文件保存到云存储里
      return cloud.uploadFile({
        cloudPath: dataCVS,
        fileContent: buffer, //excel二进制文件
      })
    })
}
4、上传云函数,开始编写页面代码,代码如下
    customize_btn(){
        //定义导出时间段
        var startDate = this.data.start_date
        var endDate = this.data.end_date
        // console.log("点击自定义导出"+startDate,endDate);
        let that = this;
        //读取users表数据
        wx.cloud.callFunction({
            name: "customize_excel",
            data: {
                //传值定义导出时间段
                start_date: startDate,
                end_date: endDate
            },
        }).then(res => {
                console.log("读取成功", res.result.fileID)
                that.getCustomizeFileUrl(res.result.fileID);
        })
        // 刷新当前页面
        that.onLoad();
        console.log("页面重载")
    },
    //获取云存储文件下载地址,这个地址有效期一天
    getCustomizeFileUrl(fileID) {
        let that = this;
        wx.cloud.getTempFileURL({
            fileList: [fileID],
        }).then(res => {
            console.log("文件下载链接", res.fileList[0].tempFileURL)
            that.setData({
                CustomizefileUrl: res.fileList[0].tempFileURL
            })
        })
    },
    //复制excel文件下载链接
    copyCustomizeFileUrl() {
        let that = this
        wx.setClipboardData({
            data: that.data.CustomizefileUrl,
            success(res) {
                wx.getClipboardData({
                    success(res) {
                        console.log("复制成功", res.data) // data
                    }
                })
            }
        })
    },
5、页面显示代码如下
        <view class="sign_in_card">
            <text class="sign_in_title">自定义导出</text>
            <!-- <view class="sign_in_list">
                <button class="export_btn">七日内数据</button>
            </view> -->
            <view class="sign_in_list">
                <view class="border_bt userInfoChange">
                    <text class="nav_left">起始时间</text>
                    <input type="text" placeholder="如:2021-5-23" bindinput='start_date' />
                </view>
            </view>
            <view class="sign_in_list">
                <view class="userInfoChange">
                    <text class="nav_left">结束时间</text>
                    <input type="text" placeholder="如:2021-6-1" bindinput='end_date' />
                </view>
            </view>
            <view class="sign_in_list">
                <button class="export_btn" bindtap="customize_btn">自定义导出</button>
            </view>
            <view class="sign_in_list">
                <view wx:if="{{CustomizefileUrl}}">
                    <button class="export_btn" bindtap='copyCustomizeFileUrl'>点我复制下载地址</button>
                    <view class="url">{{CustomizefileUrl}}</view>
                </view>
            </view>
        </view>
6、以上就是,我实现的导出excel功能,没写的那么细致,可以参照我的文章去看下提及的详细教程


评论 (0)